Here’s my favorites from the blogging world for you to peruse over the long weekend! Enjoy!
I know it’s getting pricey out there but what if you or your spouse had your heart set on the most expensive house in America? Want to know what that looks like?
It’s Copper Beech Farm on the Gold Coast of Connecticut. Forty feet above sea level in Greenwich, Connecticut, the next owner of this estate will come home to a 1,800 foot driveway, two islands, a mile of shoreline, walled gardens, a 75-foot pool, grass tennis court, greenhouse, stone carriage house, and cottage all for the low low price of…
$190,000,000
So that’s what the one and only fifty acre waterfront estate looks like. Just in case you were in the market. Pity there’s no helipad on the roof. Wherever would my pilot park the chopper?
Are you getting sick of our kitchen remodel yet? I’m not! It’s getting better and better every day! After tiling the entire bathroom, Jared brought his mad tiling skills to the kitchen. We purchased these 2″ x 3″ beautiful marble tiles from the Tile Shop. They have subtle blue, green, and grey tones that look gorgeous next to our white IKEA cabinets.
We carried the tile all the way up the wall around the kitchen window for a big impact. The window will be trimmed with the same rosettes and belly casing as the rest of the house but have a large sill made with the same butcher block as our countertops.
And did you catch the cabinet hardware? I’ll forever be receiving marine catalogs thanks to my order of 38 four inch galvanized steel boat cleats. But they’re super cute and really functional. Again, it’s all about textures. I love the rigid steel next to our sleek white cabinets. Plus, if anyone needs to dock a boat by our house, we have a couple tie ups available!
When improving your own home, it’s impossible not to notice homes around you. I’ve always loved walking in random neighborhoods, looking at different homes, seeing the way people keep them up (or don’t!) So when my friend Jamie and I set a date to meet up for a stroll every month, I knew she’d be up for a little house stalking!
This time, the neighborhood was just outside my door. Winthrop is full of interesting homes. Some new, a lot old, grand estates, and tiny cottages. In fact, Winthrop used to be filled with cottages. It was settled in 1630 by English Colonists as Pullen Poynt but later got it’s name from John Winthrop, the second governor of the Massachusetts Bay Colony. Bordering East Boston, Winthrop is a peninsula with 7 miles of shoreline. With the Atlantic Ocean to the east and Boston Harbor to the west, Winthrop became a popular vacation spot and summer weekend retreat for prominent Bostonians. Many of their cottages have been remodeled and almost all winterized to become year round residences but the town retains it’s coastal charm.
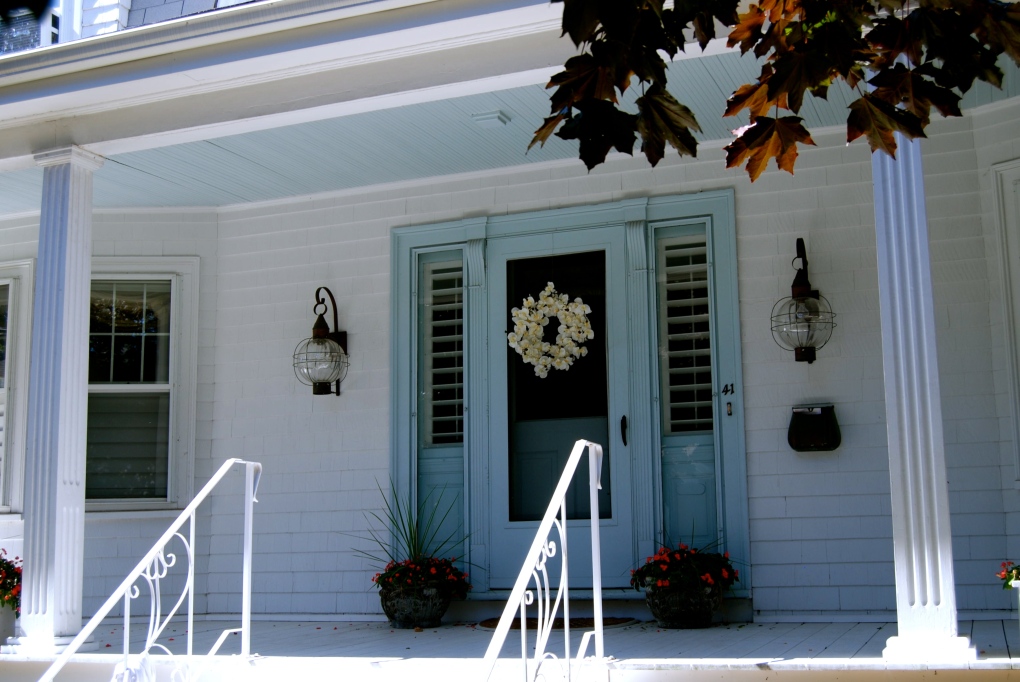
Take this lovely front porch for example. I love the nautical lanterns and sky blue door and porch ceiling.
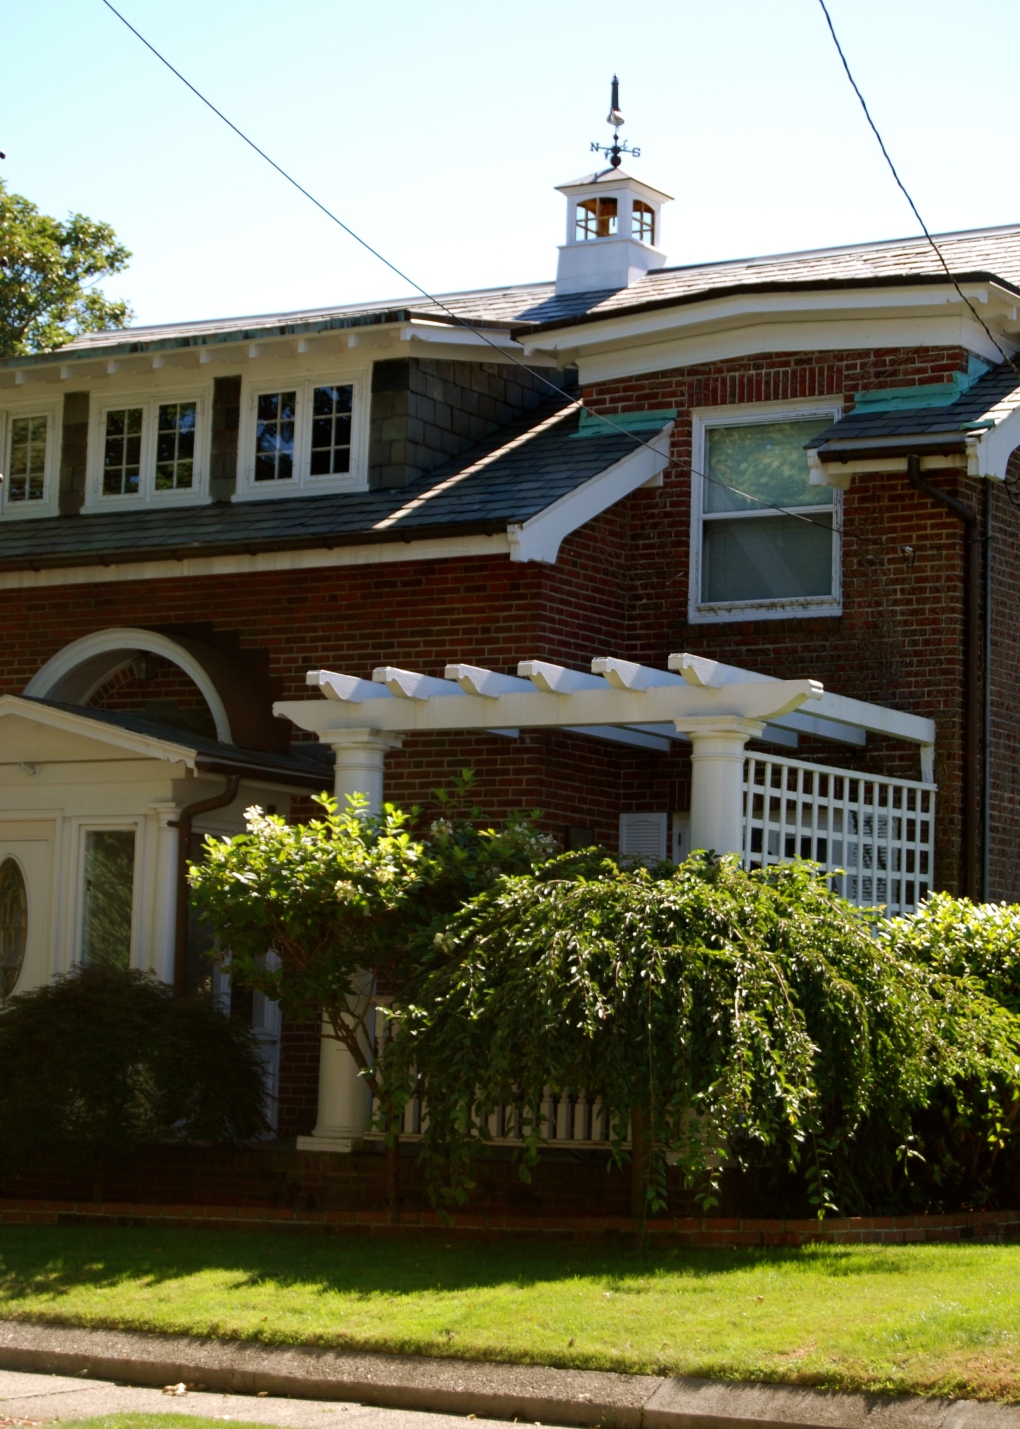
This home has an adorable cupola with a lighthouse weather vane perched at the top. The pergola surrounded by greenery seems like the perfect little quiet retreat.
Another cupola above the garage. I think this one was a lobster. Oh sorry- lobstah!
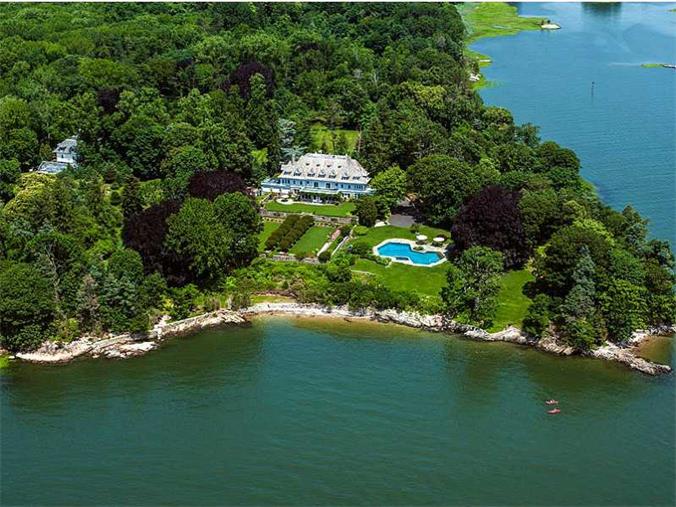
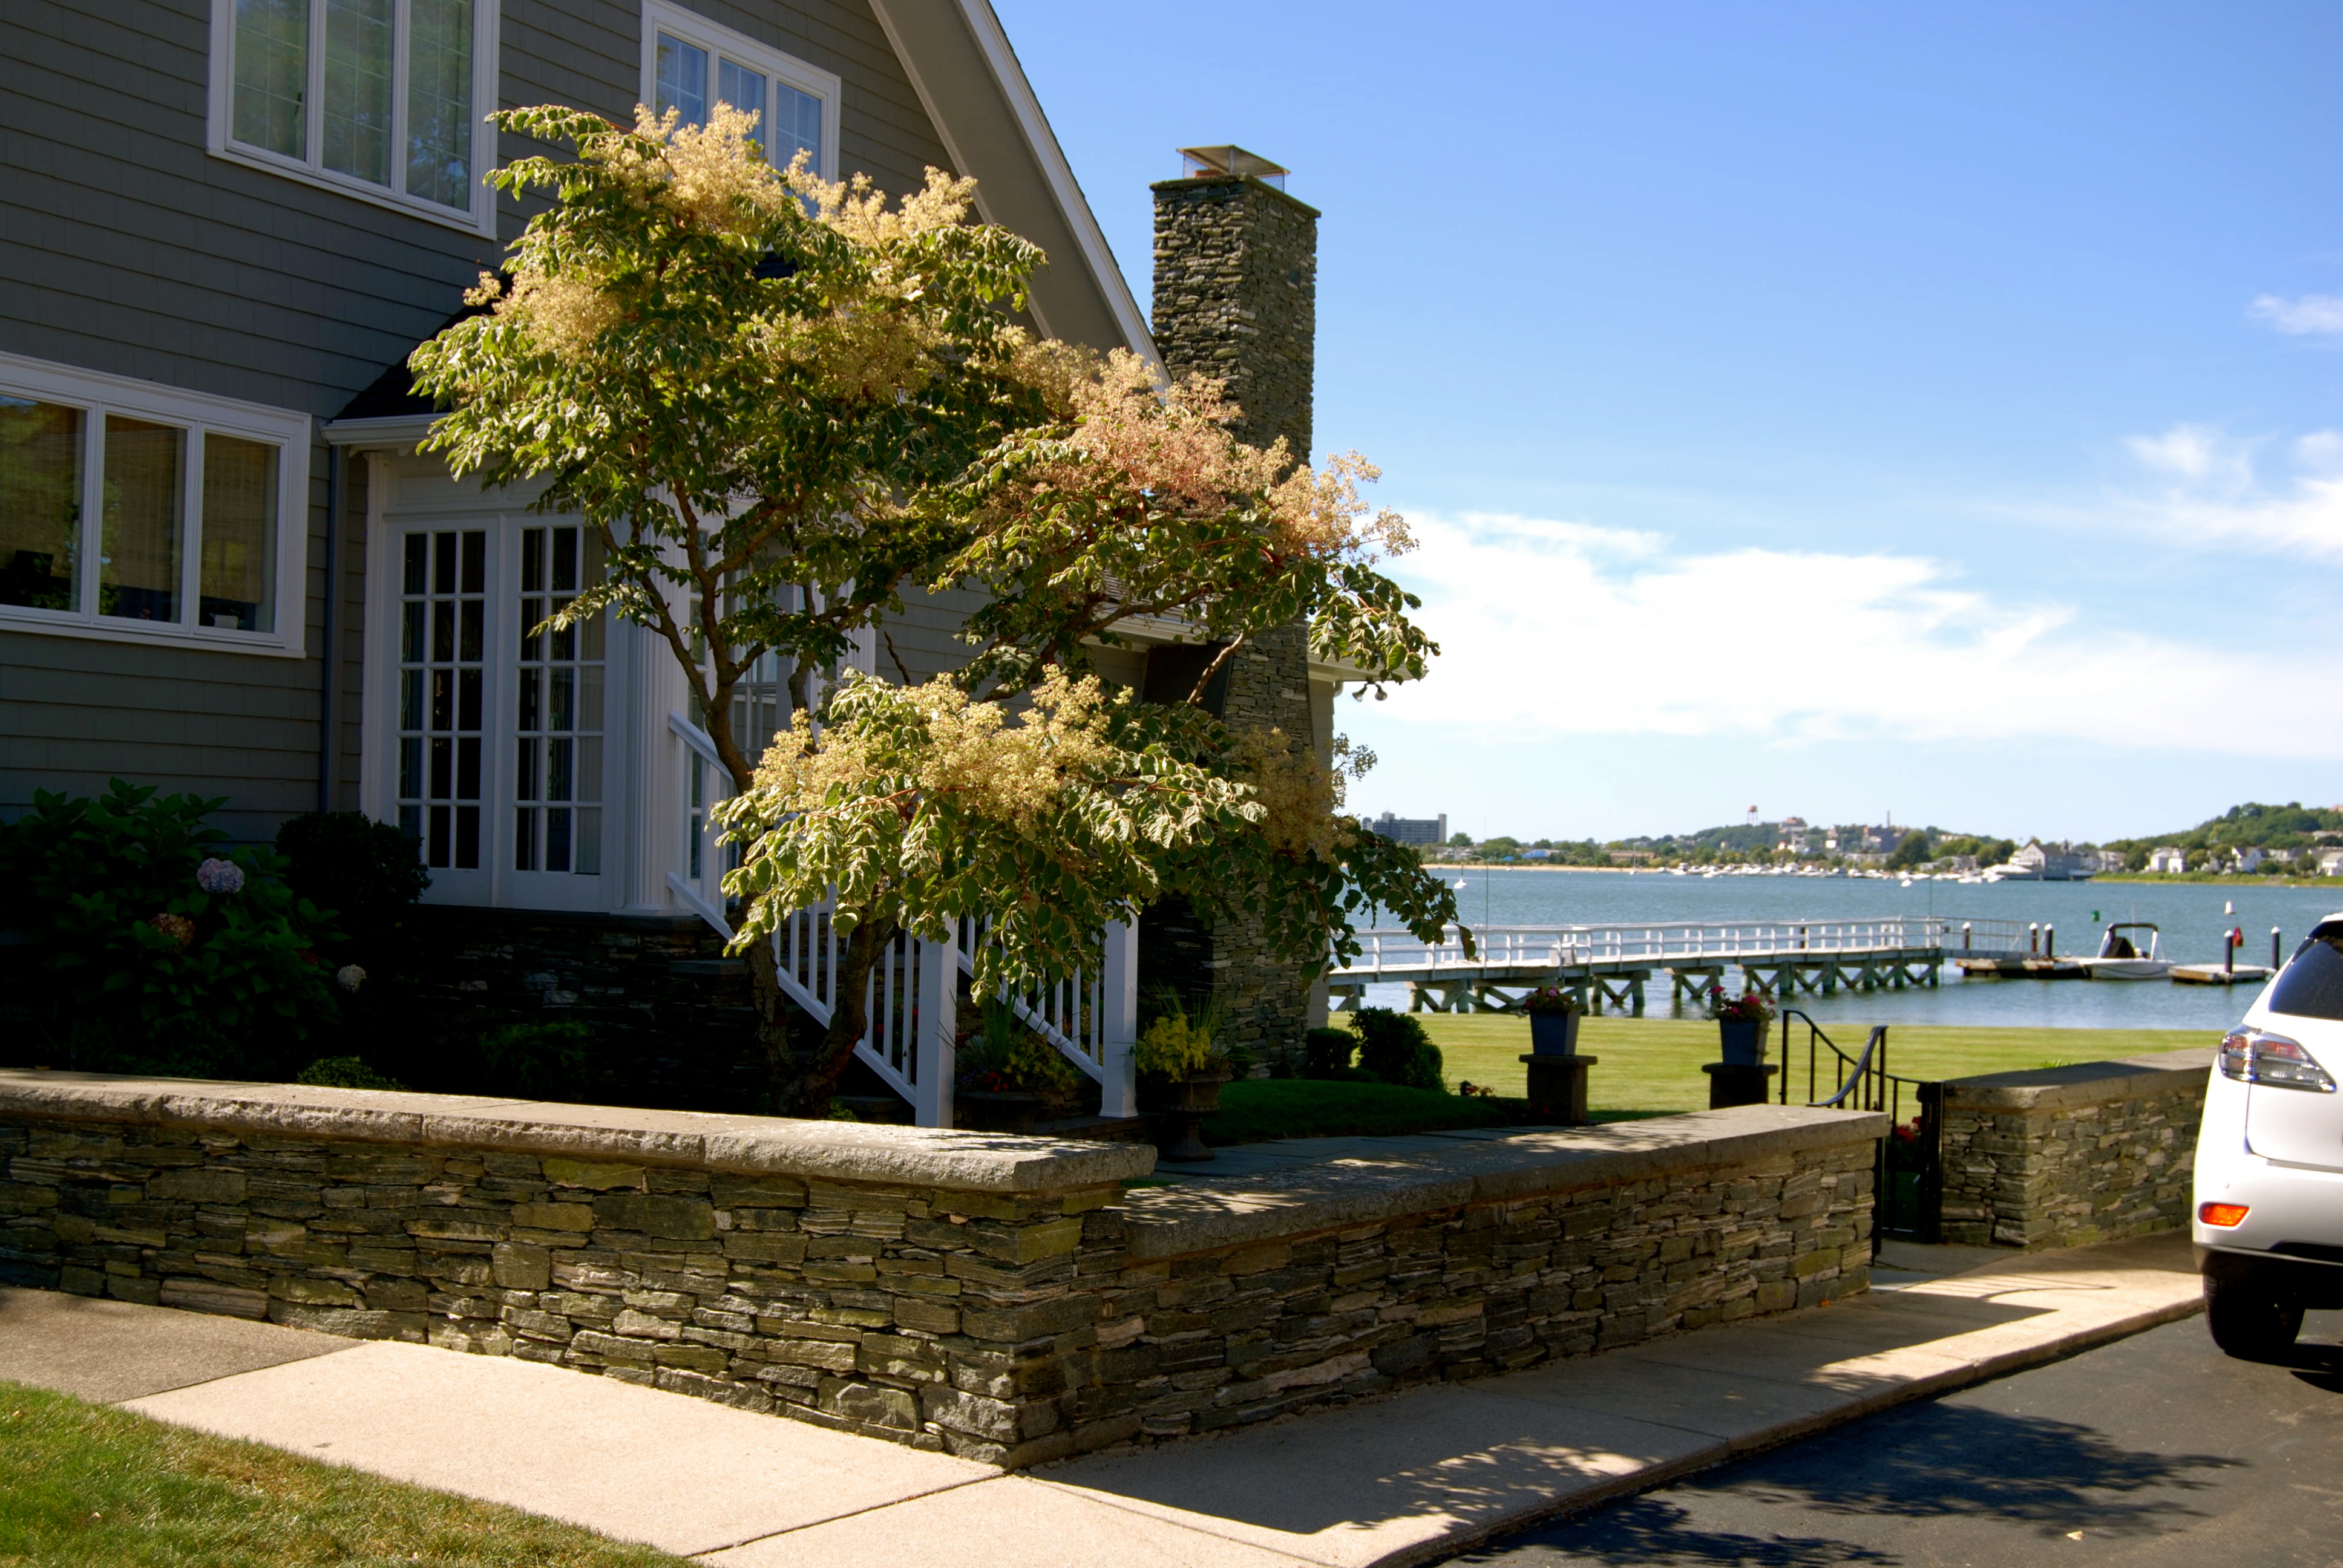
And talk about an ocean view. Most people in town would recognize this beauty of a home complete with it’s own pier.
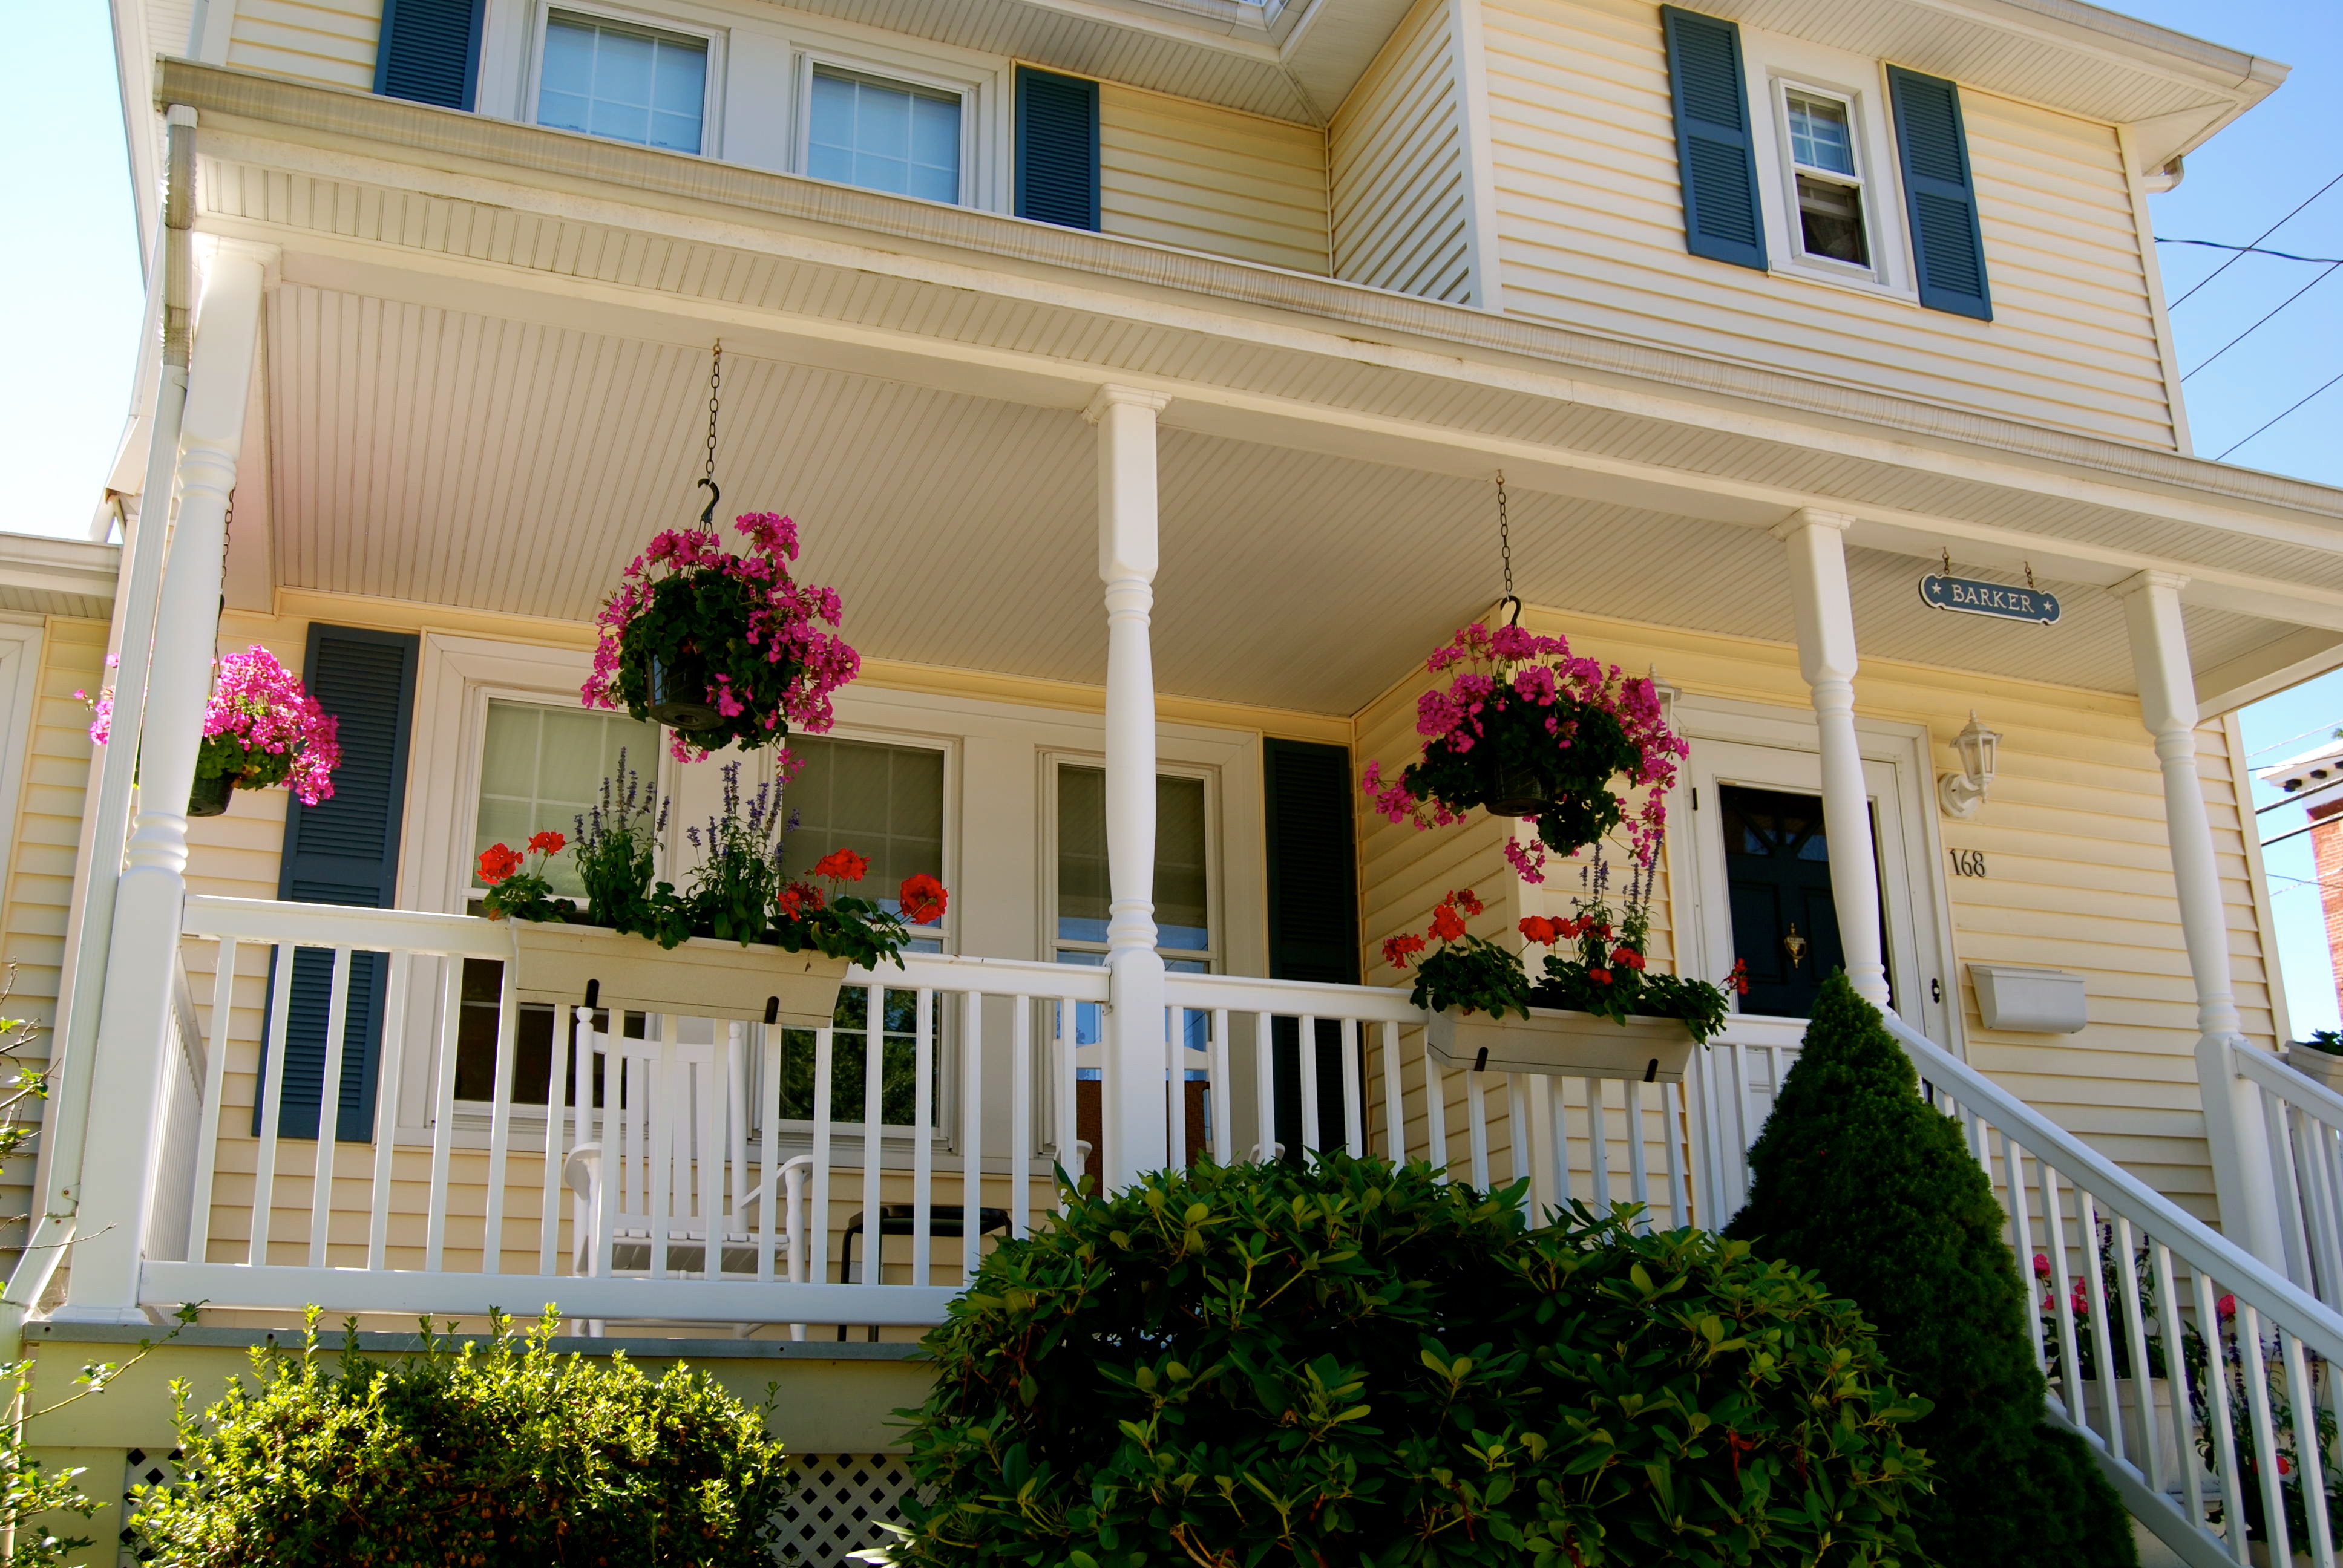
There are so many great porches in Winthrop- like these lovelies.
And looks like I’m not the only one obsessed with a statement mailbox. We saw a couple of these old bronze letter boxes.
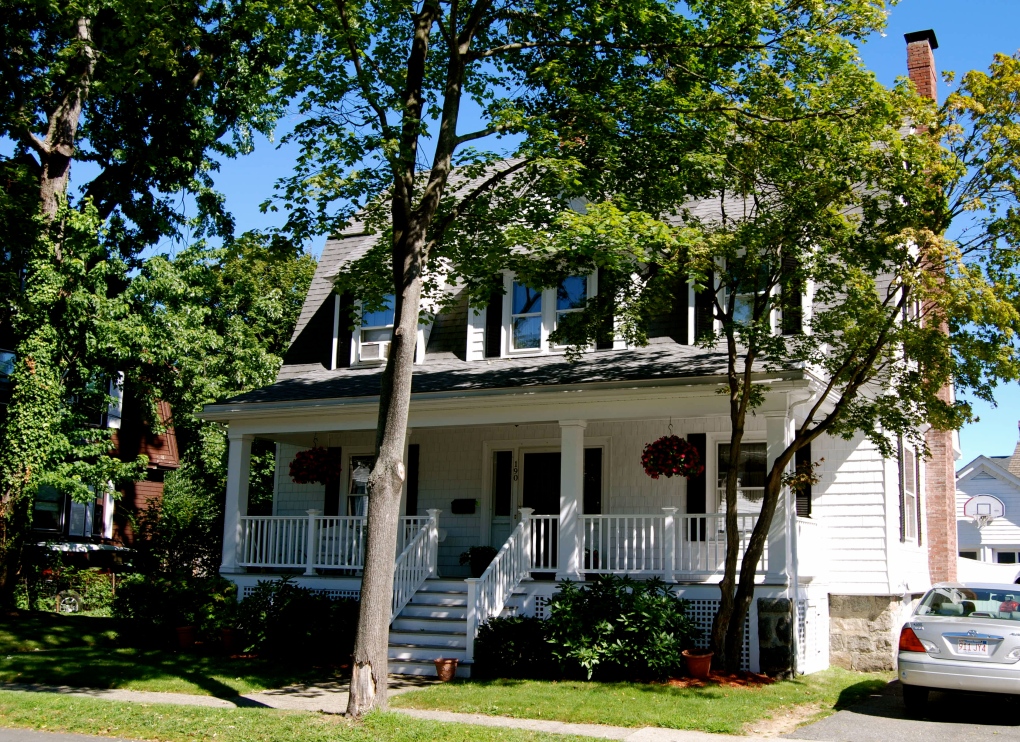
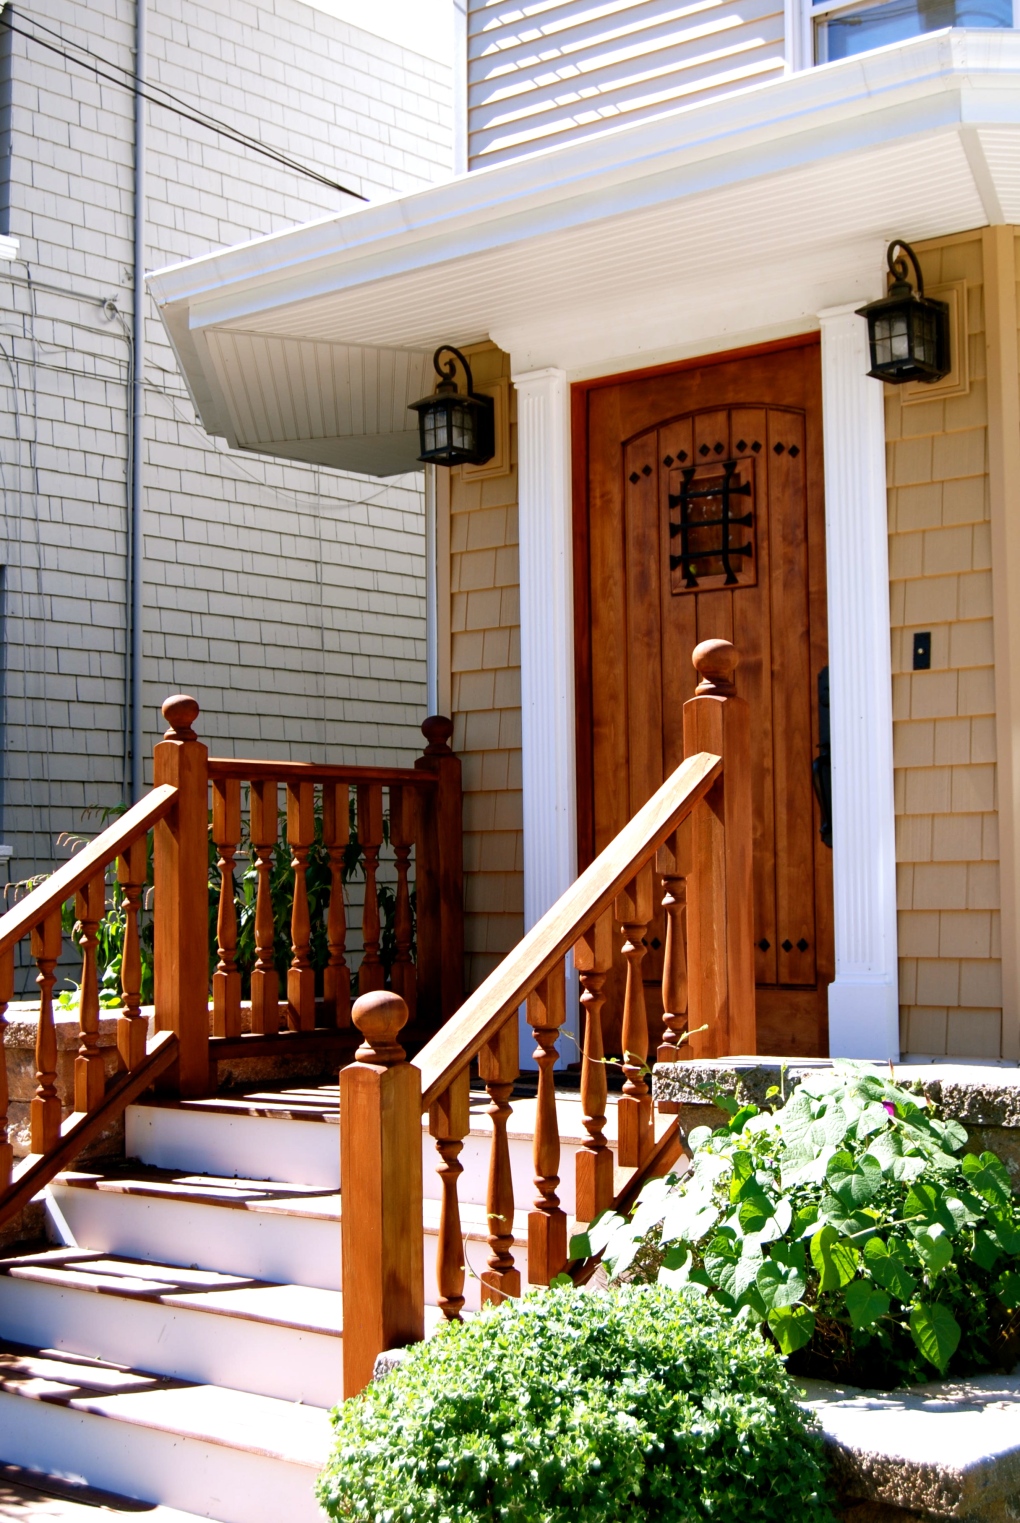
I think a prominent front door is key. It’s your home’s first impression. Make it a good one! Love this cedar looking front door and steps.
And this turquoise door is a cheery surprise.
I hope all homeowners didn’t mind my photos and compliments! Kudos to you Winthrop homeowners! You make us look good!
We’re not quite at Before and Afters but we’re pretty close. Here’s those same angles from the day we got the house back in April and this past weekend.
View in Living Room looking into Dining Room
View in Dining Room looking into Living Room
View in Kitchen looking at sink & basement door
View in Kitchen looking at Front Door
And finally, here’s the view from my gorgeous flowers that my gorgeous friend Jamie brought over this weekend! It’s amazing how much more the house is feeling less like a construction site and more like a home!
So much to love in the blogging world this week! Here are my favorites…
We’re getting there! Let’s go through the checklist…
When it comes to kitchen decor I have very strong opinions (like when do I not, right?) This is a highly functional room and I believe there should be nothing taking up valuable counter or wall space that doesn’t serve a purpose. That’s not to say your kitchen has to be void of personality or color! Here’s some of my favorite (and useful!) kitchen accessories.
BRIGHT BOWLS OF PRODUCE
Encourage healthy eating and add a pop of color with bowls or platters of fruits and veggies.
CANISTERS
Whether displayed on the counter for easy access or in the pantry, playful canisters liven up a kitchen and keep your dry goods… well, dry.
A solid color works fine but there are so many fun designs out there. Educate yourself on knot tying while you cook, show off your city pride, or my favorite- turn a handwritten note or recipe into a towel by following Emma’s instructions here.
HERBS OR SUCCULENTS
Planting an herb garden or succulents on a kitchen windowsill brings life to a kitchen- plus the herbs are quite handy when cooking! I love these little tea tins or tea cups as planters. Though most herbs are pretty hardy, just remember that modern windows are so energy efficient that they block UV rays making it difficult to grow plants in a windowsill. Succulents on the other hand, can grow in the harshest of conditions.
After much debate, we decided on IKEA’s NUMERÄR oak countertops for our new kitchen. I think it’s the best budget and design choice and honestly, I’m not worried about performance because I’m the biggest neat freak I know and go out of my way to maintain my things.
The warm wood tone will really warm up the high gloss white IKEA cabinets. Remember, this house is over 100 years old. The last thing I want is an obviously modern kitchen. But rather, an efficient kitchen with nods to the house’s history and character.
With our decision made and the countertops cut, we’ve done a TON of research on treating the wood. I was nervous about leaving the oak it’s natural color. It’s pretty light and I wanted a nice contrast with our white cabinets and a compliment to our darker wood floors. Thanks to the plethora of DIY bloggers, I was able to compile three viable options:
Number 1, we could do absolutely nothing but a mineral oil treatment. Mineral oil is a colorless, odorless mixture. Essentially it’s baby oil without the perfumes. Bloggers recommend the treatment nightly for the first week, then 2-3 times per week for the first month after instillation to get a good moisture/stain barrier in place. And finally, re-oil as needed but typically every 1-3 months depending on usage and humidity. The benefit to this is it’s food safe and water resistant and seems relatively easy to maintain. And the best part is if there is a mark on your counters from a scratch or a pen mark, you just sand the spot down and re-oil. Simple as that.
The second option was for those worried about water damage. A product called Waterlox could be applied to the counters for a permanent water tight seal. However, bloggers did warn of a yellowy hue.
The third option would definitely give us the color we were looking for and seal the counters water tight. If we applied a stain to the wood and sealed with Waterlox, the counters would look more like a piece of furniture though they would definitely be waterproof. This one is tempting since I am nervous about the color. However, I’m more nervous about the finish. I don’t want our countertops to look like a piece of shiny furniture. I want them usable and durable and natural.
Soooooo… option one it is! Dana from the blog House Tweaking gives a fantastic step by step process of her oiling routine. I especially love her kit that she’s assembled. When I know I have the right tools and tested instructions, I know I can handle this!
A: Clean Damp Rag
B: Sanding Block
C: Mineral Oil
D: Re-Usable Oiling Rags
After making sure the countertops are void of all dirt, dust, or crumbs, she wipes it down with the clean damp rag. Once dry, a drizzle of mineral oil gets rubbed in with the oiling rags in the direction of the wood grain. After the oil penetrates the wood, there may be some excess to wipe away but especially during the first month, the wood will really soak up the oil.
There have also been a lot of reports of the oil darkening the wood slightly so all in all, I’m secure in our decision. Stay tuned for the countertop reveal!
We’ve been saying for a while now that in order to move in we need to complete the kitchen, master bathroom, and bedroom. Well last week we made major steps toward finishing the master bath!
Now, there’s a lot of corners in this bathroom if you remember the floorplan I showed you here so it’s difficult to get the big picture (pun intended). But here’s an idea of all the beautiful bits and pieces.
The walls are painted Benjamin Moore’s Soft Chamois. This pale cream color is the perfect mixture between all the white tiles with dark grout and antique bronze fixtures.
Jared did all the tiling of the hexagon tiles on the floor and the subway tiles around the tub. For a first timer, I think he did a fabulous job. Especially since I insisted on these cubbies in the wall for all our shower products.
Jared says that there is a definite learning curve but since we had heard so much from our contractors about how difficult tiling is, he felt it was way easier than expected. A straight and level start is key. From then on, it’s just tile by tile, one at a time, and patience, patience, patience.
Our white subway tiles came from Home Depot at a great price and the hexagon floor tiles are from the Tile Shop. We used a pewter color grout to give a nice contrast I think that along with our antique bronze fixtures give an antique, rustic industrial vibe.
I’m purposefully not showing the sink or vanity yet. We’ll have to make a custom vanity due to the space it’s in but we also want to build it custom to use some of the boards from our house that we removed when we took down walls. A reclaimed wood vanity will fit perfectly in this bathroom. For now, my Dad has built a temporary vanity which is hilarious because it’s good enough to go in any bathroom. White table legs with a white laminate top will work just fine now while we move in and build the reclaimed wood one.
We have lots of kitchen projects coming to fruition in the next few days. It’s going to be an epic couple of weeks so stay tuned!